

HomeGroup is a new feature introduced by Windows 7 which aims to simplify the process of sharing content and devices on your home network. In older versions of Windows, sharing content was a tedious and sometimes painful process, especially for home users. By using HomeGroups, you can now access all shared content in your home network with just one click. I know it sounds to good to be true. That's why, in this article, I will show what a HomeGroup is, how it works, how to create one and join your home computers to it. Also, I'll show how to change the password of your HomeGroup and how to retrieve it in case you forgot it.
What is a HomeGroup
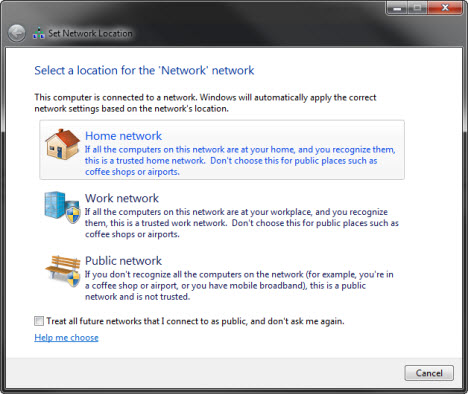
HomeGroup is a feature designed to be available for computers connected to a Home network. Each time you connect your computer to a new network, Windows 7 asks what type of network it is. If you select 'Home network', it means you are in a trusted network of computers, and Windows 7 allows you to use the HomeGroup feature. What the HomeGroup feature does is to allow all your home computers with Windows 7 installed to easily connect between them and share content.
To be more exact, all computers with Windows 7 which part of the same HomeGroup, will be sharing files, folder, devices and media without having to type passwords every time you want to access something, like it happened with older versions of Windows. You select on each computer from the HomeGroup what you want to share and everybody else can access it with a few click.
To access the HomeGroup control panel go to Control Panel -> Network and Internet -> HomeGroup.
NOTE: the HomeGroup feature is not available for Public or Work networks and it doesn't work for computers not having Windows 7 installed, even if they are part of the same home network. HomeGroups can be created only between computers with Windows 7 installed.
How to Create a HomeGroup
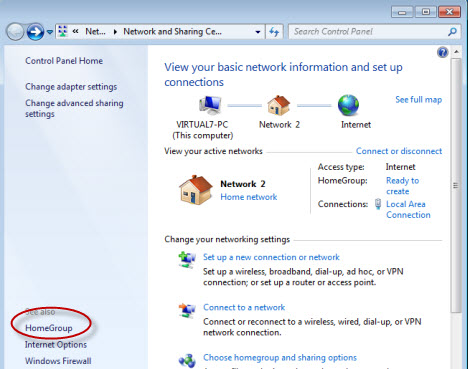
First, you need to open up the Network and Sharing Center. If you don't know how to do this, check our guide. In the Network and Sharing Center window, there is a section called 'View your active networks'. There you will see the network you are connected to, its type and if you have joined a HomeGroup or not. If there is no HomeGroup defined in your network, you will see a line which says 'HomeGroup: Ready to create'.

NOTE: If you have joined a HomeGroup and you want to create another one, you need to first leave the current HomeGroup and then create another one.
To create the HomeGroup, click on 'Ready to create' or on the HomeGroup link found on the bottom left-side of the window.
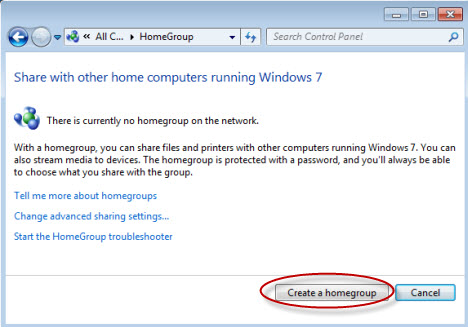
Now the HomeGroup creation wizard will start. First, click on 'Create a homegroup'.
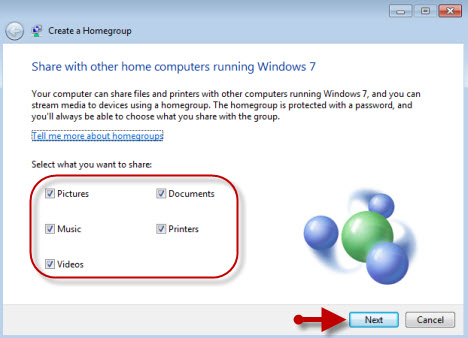
Then, it is time to select what you want to share. You will see only a limited list of libraries: Pictures, Documents, Music and Videos. Also, you'll be allowed to share your printers. Check the items you want to share and click on Next. One thing you should keep in mind is the fact that, at this step, you can share only your libraries and printers. If you are not familiar with the concept of libraries, don't hesitate to read our guide called Libraries - A Great Feature of Windows 7. As you will see, libraries are different than normal folders such as My Documents from Windows XP, for example. Also, adding more folders to the list of shared items, can be done later on and we will show how to control what you are sharing on your HomeGroup in a separate article.
After a few seconds, Windows 7 will show you the password of the HomeGroup. Unfortunately it cannot be changed at this step. If you want to change it, then it's OK to click on Finish, without writing it down. If you decide to keep this automatically generated password, then write it down or print it using the link below the password. When done, click on Finish.

The HomeGroup was created and other computers from your network can join it. At the end of the wizard, you will return to the HomeGroup window, where you will see a list of options available.

You can either change any of them or just close the window and join other computers to the HomeGroup.
How to Change the Password of a HomeGroup
Changing the password of the HomeGroup can be done from any computer which joined it. Problem is, if you change it after your home computers joined the HomeGroup, you will have to re-type it on all computers in order for them to join again. If you change the password before joining any other computers, than you don't have to re-join the other computers.
To change the password of your HomeGroup, open the HomeGroup window by clicking on the link found on the bottom left-side of the Network and Sharing Center window. Then, click on 'Change the password'.

A wizard will start asking what you want to do. Click on 'Change password'.

By default, Windows 7 will generate a new random password. If you want to, you can also type a password you desire. Just make sure it is at least eight characters long. When done, click on Next.

Then, Windows 7 will notify you that the password was changed. Click on Finish and you are done.
Where to Find Your HomeGroup Password
If you want to add another computer to the HomeGroup but you forgot the password, you can access it very easily. Start one of the PCs which is part of the HomeGroup, go to the HomeGroup control panel and click on the link that says 'View or print the homegroup password'.
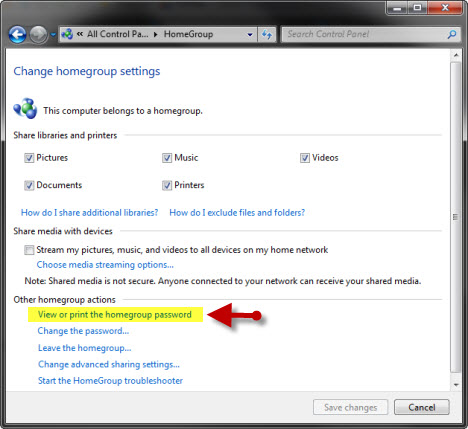
The password will be now shown in the yellow box. You can either write it down or print it by using the 'Print this page' button.

When done, close the window.
How to Join a HomeGroup
After the HomeGroup was created, it is time to join other computers. When you open the Network and Sharing Center, you will see a line of text saying 'HomeGroup: Available to join'. Click on it or on the HomeGroup link.

In the next window, click on 'Join now'.

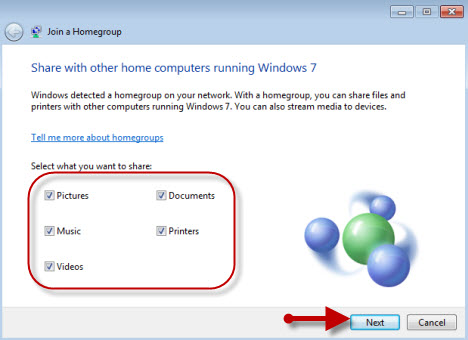
Now it's time to select what libraries and devices you want to share. When done, click on Next.
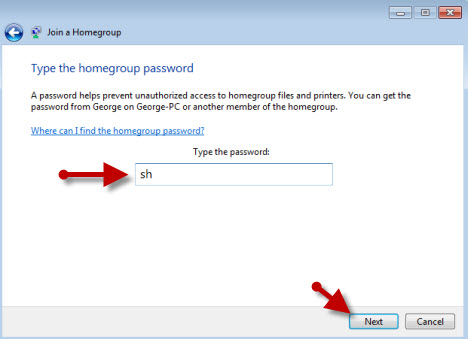
Then, you need to type the password of the HomeGroup and click on Next.
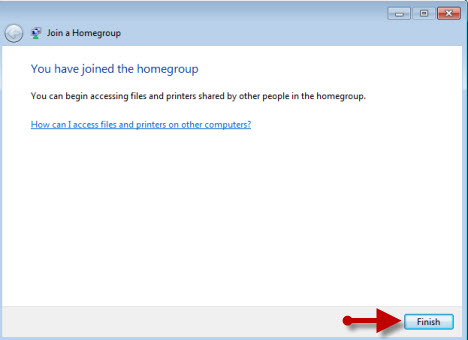
At the end, you will receive a notification that the computer has joined the HomeGroup. Click on Finish and you are done.
Repeat this procedure for all the other computers from your home network.
How to Access HomeGroup Computers
Once the HomeGroup is created and all computers are joined, accessing their shared libraries and devices is very easy. Just open up Windows Explorer and click on Homegroup. There you will see all computers that are turned on.

Double clicking on any of them will open up all their shared files, folders and devices. There will be no need for you to type any username & password, like it was the case for older versions of Windows.
How to Leave a HomeGroup
If you want to leave your HomeGroup, first you need to open up the HomeGroup control panel. Then, click on the 'Leave the homegroup' link.

You will be asked what exactly you want to do. Click again on 'Leave the homegroup'.

After a few seconds you will receive a notification that the procedure was finished successfully. Click on Finish and you are done.
Know Issues & Solutions
If you are trying to connect to your HomeGroup but you receive an error message saying that 'The password is incorrect', even though you have typed the password correctly, it means you might have encountered what it seems to be a bug. According to Microsoft, this can happen because the computer's date and time does not match the date/time of the system that owns the HomeGroup. In this case, the only solution is to adjust the date/time settings on the system joining the Homegroup, to match the system that owns the Homegroup, and then try to join again.
The system that owns the HomeGroup is the system on which the HomeGroup was first created.
Source
Hello there.
