
 Libraries are one of the coolest features introduced by Windows 7. They can help people organize their files and folders very efficiently. By using libraries, you can easily build a system so that you can always find what you want in seconds. Not only that, but you can also sort, tag or edit files and folders with just a few clicks. In this article I will explain what libraries are, show how they work and how to create new ones. Also, I'll show how to add new folders to a library, how to modify its properties and how to delete a library.
What is a Library in Windows 7?
Think of a library as a virtual collection of folders on your system. It is virtual because it doesn't exist as an actual folder. A library is a reference to one ore more folders on your computers and the files inside them. For example, you can have documents stored in multiple locations like: your Documents folder, on the desktop and some other locations. You can have a library called Documents which includes references to all these locations. When you open the library, you will see all these folders and their contents as if they would be sub-folders of the Documents library. This feature helps you organize all your files together in one place regardless of where they are stored. This has many benefits in terms of productivity when working with lots of files split in many locations.
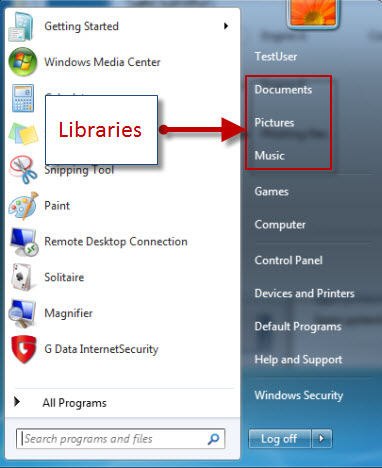
By default, you have the Documents, Music, Pictures and Videos libraries. Three of them can be found, by default, on the upper right side of your Start Menu, as highlighted below. However, you can create as many as you want.
They can also be accessed from the left side menu of Windows Explorer, as shown below.
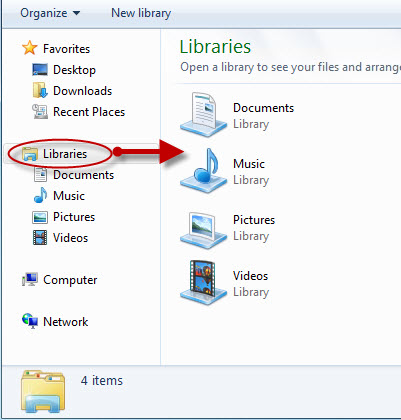
When clicking on any of the libraries, Windows Explorer will open all files or folders contained by it.
How to Create a Library
First, open Windows Explorer. Then click on Libraries from the Navigation pane. On the button bar on the top of Windows Explorer, you will see a button entitled 'New Library'. Click on it and then type the name of the newly created library.

Another way is to right click on the empty space in the Libraries window, go to New and then Library.

How to Add Folders to a Library
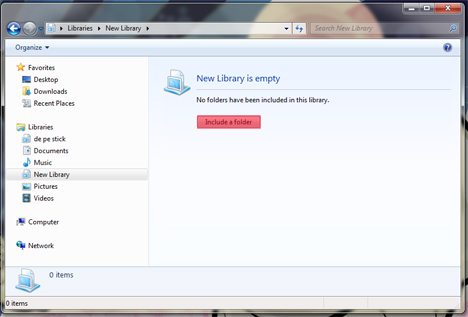
Now you have a new but empty library. To add folders to it, double click on the library to open it. Then, click on 'Include a folder' and browse your computer for one of the folders you want to include in the library.
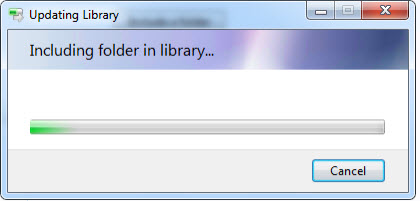
After you select the folder, Windows Explorer will scan the contents of that folder and include it in the library. The process can take a while, depending on the number of files & folders included. During this process, you will see a progress bar like the one below. When done, it will disappear and you will see the whole content of the newly created library.
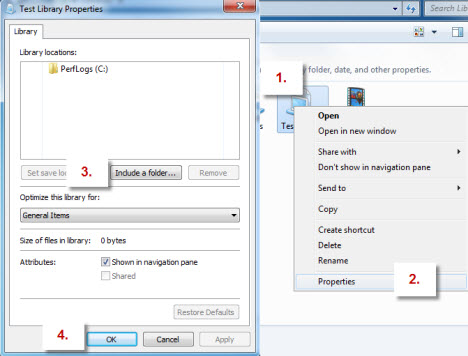
Another way is to right click on the library you want to add folders to and select Properties. Then click on 'Include a folder', browse, select the folder you want to include and click on OK.
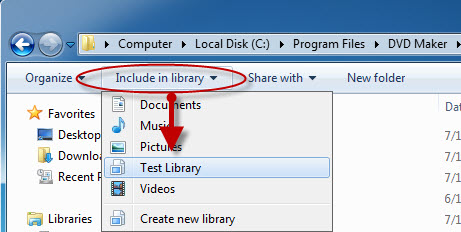
Another alternative is to open Windows Explorer and navigate to the folder you want to include in your library. Then, click on the Include in Library button, on the top of the Windows Explorer window. From the drop down menu, select the library in which you want to include the selected folder.
How to Sort the Content of a Library
In the Libraries space, every type of file has its own set of personalized characteristics, as follows:
- Documents: Folder, Author, Date modified, Tag, Type, Name;
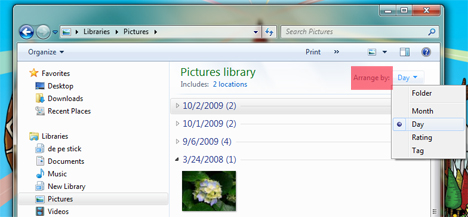
- Pictures: Folder, Month, Day, Rating, Tag;
- Music: Folder, Album, Artist, Song, Genre, Rating;
- Videos: Folder, Year, Type, Length, Name.
These are the sorting tags that you can use for each category. To use them, go to the Library you wish to sort, click on the button that is next to 'Arrange by' and select the criteria of arrangement.
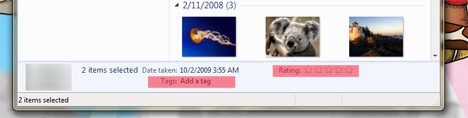
If you don't like a particular rating given or the tag that it holds you can quickly change it. Make sure you have the 'Details pane' enabled (Organize->Layout->Details Pane). Select the file or files and change their properties.
How to Edit the Properties of a Library
To open the properties window, right click on the desired library and select Properties.

The following properties are available for customization:
- The 'Set save location' gives you the possibility to select default save location for files and folders. When you add new files or folders to the library, Windows will store them in this location.
- The 'Include a folder' button will let you include a new folder in the library and Remove will remove the selected folder from the library.
- The 'Optimize this library for' drop down menu changes the way you sort through files and folders in that library. From this menu, select the type of content contained in the library. This will make Windows Explorer show relevant tags and sorting fields to the content of the library. Also, it will change the icon of the library to match its contents.
- The 'Shown in navigation pane' attribute allows the library to be shown in the navigation pane on the left side of the Windows Explorer window. When this is disabled, that library is not shown in the navigation pane.
- The Shared attribute tells you if the library is currently shared or not.

If you changed the settings of a library and you want to revert back to its initial settings, click on 'Restore Defaults'.
How Deletion Works
Deleting any content from a library means deleting it from your hard disk. Deleting the library itself deletes the library but not the folders and files contained by it. As mentioned earlier, a library is a virtual collection of files and folders. Deleting it has no effect on its contents.
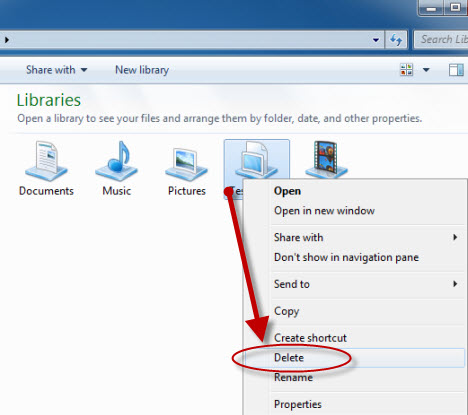
To delete a library, right click on it and select Delete.
Conclusion
As you can see, libraries are a great feature which can come in handy in many scenarios. They can help you organize your files and folders very easily so that you will find what you need very fast.
Source: 7Tutorials
Hello there.
